
Introduction to Azure
Azure from Microsoft is the public cloud provider that we will use for this course. This chapter will be that start of that journey.
Azure in the landscape of Public Cloud
As we said before, public cloud is a model of delivering computing services over the internet, where customers can access and pay for various resources on demand, such as servers, storage, databases, networks, applications, and analytics. Some of the main public cloud providers are:
 Amazon Web Services (AWS): The market leader by public cloud platform, offering over 200 services across 25 categories, such as compute, storage, database, networking, security, machine learning, and IoT. AWS has a global presence with 80 availability zones in 25 regions, and a flexible pricing model that includes pay-as-you-go, reserved, and spot instances.
 Microsoft Azure: The second-largest public cloud provider and the fastest-growing one, offering over 200 services across 18 categories, such as compute, storage, database, networking, security, AI, and blockchain. Azure has a global presence with 66 regions, more than any other cloud provider, and a hybrid cloud capability that allows customers to integrate their on-premises and cloud environments. Azure also has a flexible pricing model that includes pay-as-you-go, reserved, and spot instances, as well as free and discounted offers for students, startups, and nonprofits.
 Google Cloud Platform (GCP): The third-largest public cloud provider and the most innovative one, offering over 100 services across 20 categories, such as compute, storage, database, networking, security, data analytics, and AI. GCP has a global presence with 24 regions and 73 zones, and a strength in big data and machine learning, leveraging Google's expertise and infrastructure. GCP also has a flexible pricing model that includes pay-as-you-go, sustained use, and preemptible instances, as well as free and discounted offers for students, startups, and nonprofits.
For this course we will work with Microsoft Azure, as it is the easiest to get started with by yourself as a student.
🛠 Creating your Azure subscription account
Before you can create and configure anything on Azure, you need to have an Azure account. If you are a student, you can get a free Azure account with $100 credit and access to more than 55 services. To create a free Azure account or an Azure for students account, follow these steps:
- Go to the Azure for Students page and click on Start free.
- Sign in with your Thomas More account.
- Verify your academic status:
- Fill in your First name and Last name
- In the Country field choose Belgium no matter where you are from. This field is for the country of the school
- In the School name field, choose Thomas More - Campus Geel (Geel)
- Fill in the rest of the page
- Complete your profile:
- Fill in your First name and Last name again
- In this Country field you need to provide your country on origin as it is on your passport or indentity card.
- Accept the customer agreement at the bottom of the page
- Click on 'Sign up'
- After verification, you will receive a confirmation email with a link to activate your Azure for Students subscription.
- Click on the link and sign in to the Azure portal with your Microsoft account credentials. You will see your Azure for Students subscription and your $100 credit on the dashboard.
You can now use your Azure for Students account to create and configure your resource group and other Azure services. For more information, you can check the Azure Free Account FAQ.
Key concepts of Azure
Some of the key concepts and terms related to Azure are:
- Regions: A region is a geographical area that contains one or more data centers, where Azure services and resources are deployed and hosted. This supports Azure's high availability (HA) and disaster recovery (DR). Each region has a name, such as "West Europe" or "East US", and a pair of region codes, such as "WEU" or "EUS". Azure regions are grouped into geographies, such as "Europe" or "Americas", which define the data residency, sovereignty, and compliance boundaries for customers.
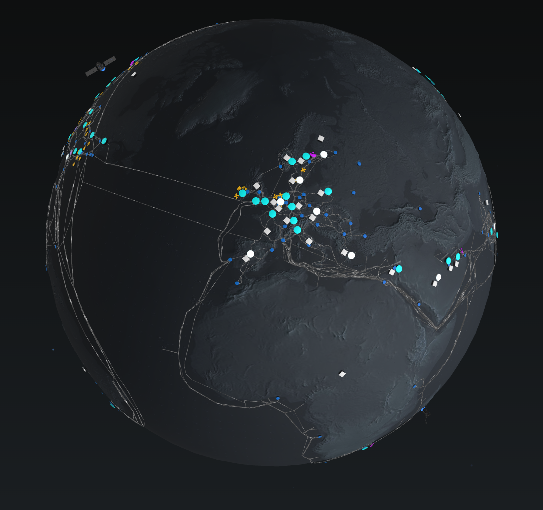
Look at the 🌎 interactive global map showing all of Azure's major infrastructure.
- Subscriptions: A subscription is a logical container that represents a billing and management boundary for Azure services and resources. Each subscription has a name, such as "My Subscription", and an ID, such as "1234-5678-9012-3456". Customers can have multiple subscriptions under the same Azure account, and can use them to organize their resources by project, department, or environment.
- Resource groups: A resource group is a logical container that groups together related Azure services and resources, such as virtual machines, storage accounts, and network interfaces. Each resource group has a name, such as "My Resource Group", and a location, such as "West Europe". Customers can use resource groups to manage their resources as a unit, and to apply policies, permissions, and tags to them.
🛠 Checking your subscription and creating a first Resource group
- Check your subscription: It is always a good idea to first check your subscriptions.
- Go to the Azure Portal.
- Search for Subscriptions.
- Click on your subscription in the list.
- Create and configure your resource group: A resource group is a logical container that groups together related Azure services and resources. To create and configure your resource group, you can use either the Azure portal or the Azure CLI.
- Using the Azure portal: The Azure portal is a web-based graphical user interface that allows you to access and manage your Azure services and resources. To create and configure your resource group using the Azure portal, you can follow these steps:
- Sign in to the Azure portal with your Azure account credentials.
- On the left menu, click on Resource groups.
- On the top menu, click on Add.
- On the Create a resource group page, enter the following information:
- Subscription: Select the subscription that you want to use for your resource group. This will be the subscription you just set up.
- Resource group: Enter a name for your resource group, such as "MyResourceGroup".
- Region: Select the region where you want to create your resource group, such as "West Europe".
- Click on Review + create, and then click on Create.
- Using the Azure Cloud Shell: The Azure Cloud Shell is a command-line integrated in the web portal that allows you to access and manage your Azure services and resources. To create and configure your resource group using the Azure CLI on Azure Cloud Shell, you can follow these steps:
- Open the Azure Cloud Shell via the >_ icon in the menu at the top of the Azure Portal, a shell will open at the bottom.
- Create your resource group, using the command
az group create, and enter the following information:- --name: Enter a name for your resource group, such as "MyResourceGroup".
- --location: Enter the region where you want to create your resource group, such as "westeurope".
- For example, the command could look like this:
az group create --name MyResourceGroup --location westeurope.
- Using the Azure portal: The Azure portal is a web-based graphical user interface that allows you to access and manage your Azure services and resources. To create and configure your resource group using the Azure portal, you can follow these steps:
Azure specific billing & costs
Azure charges for its services and resources based on the following factors:
- Service type: Azure offers different types of services, such as compute, storage, database, networking, and security, each with its own pricing model and unit of measurement. For example, Azure charges for compute services by the hour or the second, depending on the type of virtual machine, and for storage services by the gigabyte or the transaction, depending on the type of storage account.
- Usage: Azure charges for the actual usage of its services and resources, based on the amount, duration, and frequency of consumption. For example, Azure charges for the number of hours or seconds that a virtual machine is running, the amount of data that is stored or transferred, and the number of requests that are made to a database or an API.
- Location: Azure charges different prices for its services and resources in different regions, based on the cost of operating and maintaining the data centers, the demand and supply of the resources, and the local taxes and regulations. For example, Azure charges more for a virtual machine in Japan than in India, and more for a storage account in Australia than in Canada.
- Performance tier: Azure offers different levels of performance, reliability, and scalability for its services and resources, each with its own price and specification. For example, Azure offers different sizes and families of virtual machines, such as A, B, D, and F, each with a different number of cores, memory, disk, and network bandwidth, and different prices per hour or per second.
Customers can estimate and monitor their Azure spending using the following tools:
- Pricing calculator: A web-based tool that allows customers to estimate the cost of using Azure services and resources, based on their expected usage, location, and performance tier. Customers can use the pricing calculator to compare different options, plan their budget, and optimize their spending.
- Cost management portal: A web-based portal that allows customers to track and analyze their Azure spending, based on their actual usage, location, and performance tier. Customers can use the cost management portal to view their invoices, download their usage reports, set up their billing alerts, and create their cost analysis charts and dashboards.
- Billing alerts: A feature that allows customers to set up notifications and actions when their Azure spending reaches or exceeds a certain threshold, based on their actual usage, location, and performance tier. Customers can use the billing alerts to monitor their spending, control their budget, and prevent overspending.
Customers can optimize and reduce their Azure costs using the following strategies:
Choosing the right service level: Customers can choose the most appropriate and cost-effective service level for their needs, based on the performance, reliability, and scalability requirements of their applications and workloads. For example, customers can choose a lower-priced virtual machine size or family, a lower-priced storage account type or redundancy option, or a lower-priced database service tier or edition.
⚠ We will always try to use the Free tier available or Free services eligible service levels to not drain our account funds! ⚠

Creating a VM using a Free services eligible size of Ubuntu Scaling on demand: Customers can adjust the capacity and performance of their Azure services and resources almost instantly, based on the actual demand and workload of their applications and workloads. For example, customers can use the autoscaling feature to automatically increase or decrease the number of virtual machines, the storage account capacity, or the database throughput, depending on the CPU utilization, the data volume, or the request rate.
Reserving instances: Customers can prepay for a certain amount of Azure services and resources for a certain period of time, usually one or three years, and get a significant discount, up to 72%, compared to the pay-as-you-go prices. For example, customers can reserve virtual machine instances, storage account capacity, or database service capacity, and pay a fixed amount per month or per year, regardless of the actual usage.
🛠 Working with pricing and billing
- Estimate your workload costs: Before you deploy any Azure services or resources, it is important to estimate how much they will cost you. You can use the Azure Pricing Calculator to get a quick and accurate estimate of your expected monthly costs based on your usage and configuration. Learn how to use the Azure Pricing Calculator by completing this exercise on Microsoft Learn.
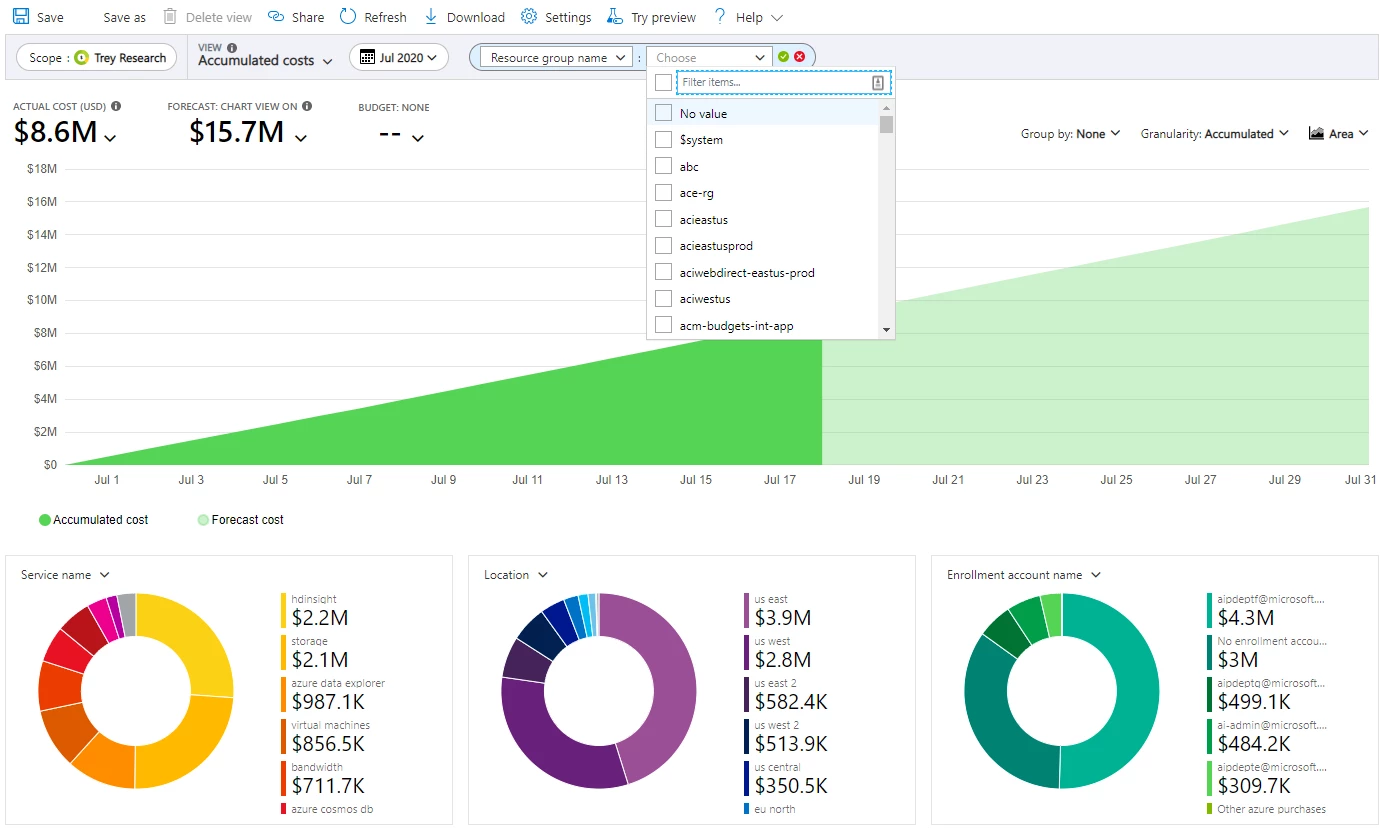
- Check your cost management and billing: Once you have deployed your Azure services and resources, you can monitor and optimize your spending using the Cost Management + Billing service in the Azure portal. This service allows you to view and analyze your current and past invoices, track your spending by resource group or service, set budgets and alerts, and get recommendations for cost savings.
- Go to the Azure portal.
- On the left menu, click on Cost Management + Billing.
- On the Cost Management + Billing page, you can access various features and tools to manage your costs and billing, such as:
- Overview: See a summary of your current billing period, including your forecasted costs, actual costs, and budget status.
- Cost analysis: Explore and analyze your costs in detail, using charts, filters, and grouping options. You can also export your cost data to a CSV or JSON file.
- Budgets: Create and manage budgets for your subscriptions or resource groups, and get notified when your spending reaches or exceeds a certain threshold.
- Recommendations: Get personalized suggestions for reducing your costs, such as resizing or deleting unused resources, purchasing reserved instances, or applying Azure credits.
Core Azure Services & related use cases
Azure offers a wide range of services that cover the most common cloud scenarios, such as compute, storage, networking, database, and security.
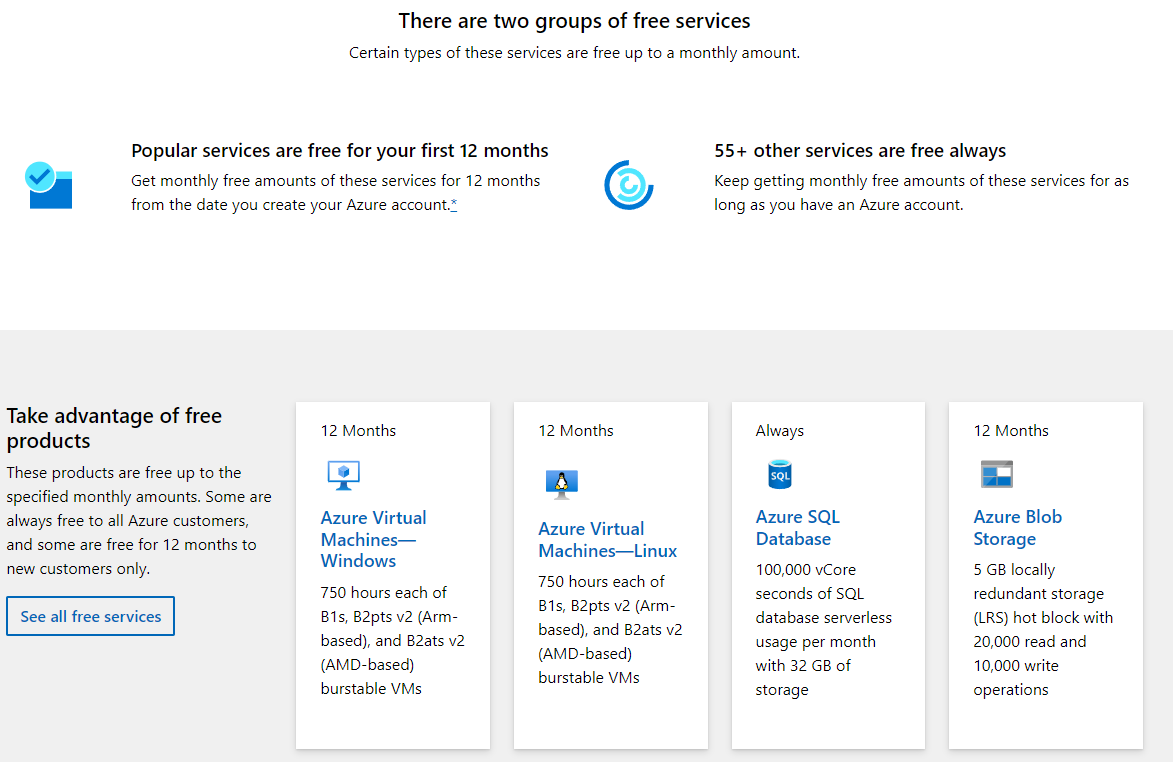
Look through the list of free services included in your account, and on the Azure portal to find some of the core Azure services:
Compute: Azure provides various options for running applications and workloads on the cloud, such as virtual machines, containers, serverless functions, and web apps. Each option has its own features and benefits, such as scalability, availability, performance, and cost. Some of the typical use cases and examples of Azure compute services are:
- Virtual machines (VMs) - 🗄 IaaS: VMs are the most basic and flexible compute option, where customers can create and run their own virtual machines on Azure, using the operating system, software, and configuration of their choice. VMs are suitable for scenarios where customers need full control and customization over their environment, such as migrating old applications to the cloud, running high-performance computing workloads, or hosting databases.
- Web apps - 📐 PaaS: Web apps are a managed and scalable compute option, where customers can build and host their web applications on Azure, using various languages and frameworks, such as .NET, Java, Python, and Node.js. Web apps are suitable for scenarios where customers need to create and run web applications with minimal overhead, such as building websites, e-commerce platforms, or content management systems.
- Azure AI - 🖥 SaaS: Azure AI is a comprehensive and integrated set of cloud services that enable customers to build and deploy intelligent applications and solutions on Azure, using various AI capabilities, such as machine learning, computer vision, natural language processing, speech recognition, and conversational AI. Azure AI is suitable for scenarios where customers need to leverage AI to enhance their existing applications or create new ones, such as analyzing images, extracting insights from text, generating natural language, or building chatbots.
Storage: Azure provides various options for storing and accessing data on the cloud, such as disks, blobs, files, queues, and tables. Each option has its own features and benefits, such as capacity, durability, availability, and performance. Some of the typical use cases and examples of Azure storage services are:
- Disks - 🗄 IaaS: Disks are the primary storage option for Azure VMs, where customers can attach one or more disks to their VMs, and use them to store and access their data. Disks are suitable for scenarios where customers need to store and access data that is closely related to their VMs, such as operating system files, application files, or temporary data.
- Files - 🗄 IaaS: Files are the primary storage option for shared data on Azure, where customers can store and access files using the standard SMB protocol, and mount them to their VMs or on-premises machines. Files are suitable for scenarios where customers need to store and access data that is shared among multiple users or applications, such as storing configuration files, user profiles, or logs.
- Queues - 📐 PaaS: Queues are the primary storage option for messaging data on Azure, where customers can store and access messages that are exchanged between different applications or services. Queues are suitable for scenarios where customers need to store and access data that is asynchronous, transient, or distributed, such as decoupling applications, enabling load balancing, or implementing workflows.
- Tables - 📐 PaaS: Tables are the primary storage option for structured data on Azure, where customers can store and access data that is organized in rows and columns, using a NoSQL model. Tables are suitable for scenarios where customers need to store and access data that is simple, scalable, or schemaless, such as storing user data, product data, or settings.
- Blobs - 📐 PaaS: Blobs are the primary storage option for unstructured data on Azure, where customers can store and access data that is not organized in a predefined manner, such as text, images, videos, or binary data. Blobs are suitable for scenarios where customers need to store and access data that is massive, diverse, or complex, such as serving web content, storing data for analytics, or archiving data.

Networking: Azure provides various options for connecting and securing applications and resources on the cloud, such as virtual networks, load balancers, firewalls, and gateways. Each option has its own features and benefits, such as isolation, routing, balancing, and protection. Some of the typical use cases and examples of Azure networking services are:
- Virtual networks (VNETs) - 🗄 IaaS: VNETs are the primary networking option for Azure resources, where customers can create and manage their own private networks on Azure, and connect them to their on-premises or other cloud networks. VNETs are suitable for scenarios where customers need to create and manage their own network topology, such as defining subnets, IP addresses, DNS settings, and network security groups.
- Firewalls - 🗄 IaaS: Firewalls are the primary networking option for protecting Azure resources, where customers can create and configure firewalls to filter and block the network traffic to and from their VNETs, VMs, containers, or web apps. Firewalls are suitable for scenarios where customers need to enhance the security and compliance of their applications, such as preventing unauthorized access, enforcing policies, or auditing logs.
- Gateways - 🗄 IaaS: Gateways are the primary networking option for connecting Azure resources, where customers can create and configure gateways to establish secure and reliable connections between their VNETs and their on-premises or other cloud networks. Gateways are suitable for scenarios where customers need to extend and integrate their applications, such as enabling hybrid cloud, supporting VPN, or facilitating data transfer.
Database: Azure provides various options for storing and managing data on the cloud, such as relational databases, non-relational databases, data warehouses, and data lakes. Each option has its own features and benefits, such as consistency, scalability, performance, and cost. Some of the typical use cases and examples of Azure database services are:
- Relational databases - 📐 PaaS: Relational databases are the primary database option for structured data on Azure, where customers can create and manage their own relational databases on Azure, using SQL as the query language. Relational databases are suitable for scenarios where customers need to store and manage data that is organized in tables and follows a predefined schema, such as storing transactional data, business data, or operational data.
- Non-relational databases - 📐 PaaS: Non-relational databases are the primary database option for semi-structured or unstructured data on Azure, where customers can create and manage their own non-relational databases on Azure. Non-relational databases are suitable for scenarios where customers need to store and manage data that is not organized in tables and does not follow a predefined schema, such as storing social media data, IoT data, or geospatial data. You will look at this more in detai later.
- Data warehouses - 📐 PaaS: Data warehouses are the primary database option for analytical data on Azure, where customers can create and manage their own data warehouses on Azure, using SQL Data Warehouse as the query language. Data warehouses are suitable for scenarios where customers need to store and manage data that is aggregated, historical, and multidimensional, such as performing business intelligence, data mining, or reporting.
Security: Azure provides various options for securing and monitoring applications and resources on the cloud, such as identity and access management, encryption and key management, threat detection and prevention, and compliance and governance. Each option has its own features and benefits, such as authentication, authorization, confidentiality, and integrity. Some of the typical use cases and examples of Azure security services are:
- Identity and access management - 🖥 SaaS: Identity and access management is the primary security option for controlling who can access what on Azure, where customers can create and manage their own identities and access policies on Azure, using Azure Active Directory as the identity provider and Azure Role-Based Access Control as the access controller. Identity and access management is suitable for scenarios where customers need to secure and manage their users and resources, such as verifying identities, granting permissions, or enforcing policies. Your Thomas More account and Canvas account are managed like this!
- Encryption and key management - 🖥 SaaS: Encryption and key management is the primary security option for protecting data on Azure, where customers can create and manage their own encryption keys, using Azure Key Vault as the key store and Azure Disk Encryption as the encryption service. Encryption and key management is suitable for scenarios where customers need to encrypt and decrypt their data, such as storing sensitive data, transmitting confidential data, or complying with regulations.
- Threat detection and prevention - 🖥 SaaS: Threat detection and prevention is the primary security option for detecting and responding to threats on Azure, where customers can create and manage their own threat detection and prevention policies and tools on Azure, using Azure Security Center as the threat management service and Azure Sentinel as the threat intelligence service.
🛠 Your first Azure deployment: a VM
You will now create and configure your first Azure service, a virtual machine.
⚠ Be sure to not skip step 5 and delete the VM after your work! If all the funds in your account are drained due to a forgotten VM your account will be locked! ⚠
Create and configure your virtual machine: A virtual machine is a virtualized computer that runs on Azure, where you can install and run your own operating system, software, and configuration. To create and configure your virtual machine, you can use either the Azure portal or the Azure Cloud Shell CLI.
Using the Azure portal: To create and configure your virtual machine using the Azure portal, you can follow these steps:
- On the left menu, click on Virtual machines.
- On the top menu, click on Create.
- Select Azure virtual machine.
- On the Create a virtual machine page, enter the following information:
- Basics tab:
- Subscription: Select the subscription that you want to use for your virtual machine. Use your Azure for Students or Azure Free account.
- Resource group: Select the resource group that you created earlier, such as "MyResourceGroup".
- Virtual machine name: Enter a name for your virtual machine, such as "MyVM".
- Region: Select the region where you want to create your virtual machine, for now take "UK West".
- Availability options: Select the availability option that you want to use for your virtual machine, such as "No infrastructure redundancy required".
- Security type: Select the security type that you want to use for your virtual machine, for now take "Standard".
- Image: Select the image that you want to use for your virtual machine, for now take "Ubuntu Server 22.04 LTS - x64 gen2".
- Size: Select the size that you want to use for your virtual machine, for now take either "B1s (free services eligible)" or "B2ats_v2 (free services eligible)". To get this option, open the dropdown menu and select See all sizes and then open the B1-series or B2-series v2 list.

- Administrator account: Select Password and enter the username and password that you want to use for your virtual machine.
- Inbound port rules: Select the inbound ports that you want to allow for your virtual machine. Aside from SSH (22), also select "HTTP (80)" because we will be configuring a web server to host a website that we will want to access from the outside.
- Disks tab:
- OS disk type: Select the disk type that you want to use for your operating system disk, for now take "Standard SSD".
- Data disks: Optionally, you can add one or more data disks to your virtual machine, and select the disk type, size, and encryption settings for each data disk. We will not do this.
- Networking tab:
- Virtual network: Select the virtual network that you want to use for your virtual machine, leave the default.
- Subnet: Select the subnet that you want to use for your virtual machine, leave the default.
- Public IP: Select the public IP address that you want to use for your virtual machine, leave the default.
- NIC network security group: Select the network security group that you want to use for your virtual machine, leave the default.
- Public inbound ports: Select the public inbound ports that you want to allow for your virtual machine, leave the default.
- Select inbound ports: Select the inbound ports that you want to allow for your virtual machine. "HTTP (80)" and "SSH (22)" should be selected
- Management tab:
- Enable auto-shutdown: Optionally, you can enable or disable the auto-shutdown feature, which allows you to schedule a daily shutdown time for your virtual machine to save costs. To have a back-up measure in case we forget to delete the virtual machine after this exercise, selet this to be available.
- Advanced tab:
- Extensions: A user can add one or more extensions to your virtual machine, which are software packages that enhance the functionality or security of your virtual machine, such as antivirus, backup, or monitoring agents.
- Custom data: A user can enter some custom data for your virtual machine, which is a script or a file that runs during the first boot of your virtual machine, such as cloud-init or PowerShell scripts.
- Tags tab:
- Tags: Optionally, a user add one or more tags to your virtual machine, which are name-value pairs that help you organize and identify your resources.
- Basics tab:
- Click on Review + create, and then click on Create. In case you get an error that says that there are currently 0 CPUs available or an error mentioning quota, it means that Microsoft will not allocate any more CPUs for the cheapest VM sizes in this region! You will have to switch to another region and (free) size combination to see if there are still CPUs available for this size.
- Wait for Azure to create your VM.
Using the Azure Cloud Shell CLI: To create and configure your virtual machine using the Azure Cloud Shell CLI, you can try out this Azure Learn Exercise.
Connect to and interact with your virtual machine: Once you have created and configured your virtual machine, you can connect to and interact with it using tools such as Secure Shell (SSH):
- On the Azure portal, go to your virtual machine page, and click on Connect on the top menu.
- At the top of the Connect page, copy the public IP address that is displayed.
- Open a terminal or a command prompt and run the SSH command to connect. This is a combination of the
sshcommand, the administrator username that you selected at virtual machine creation and the public IP address of the VM. For examplessh topuser5587s@52.174.12.34 - Enter the password that you used for your virtual machine and press Enter.
- You should see the prompt of your virtual machine, such as
topuser5587s@MyVM:~$.
Install Nginx on the VM and configure the default site: After that, you can install Nginx and configure the default site on your virtual machine using SSH, as you have done before.
- Run the command
sudo apt-get updateto update the package lists for upgrades and new packages. - Run the command
sudo apt-get install -y nginx-coreto install the Nginx core package, which includes the Nginx web server and some essential modules. While it is installing check what Nginx core is actually used for. - Run the command
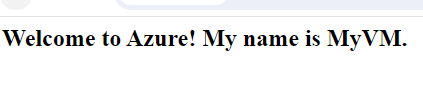
echo "<html><body><h2>Welcome to Azure! My name is $(hostname).</h2></body></html>" | sudo tee -a /var/www/html/index.htmlto append a custom message to the default index.html file, which will display the hostname of your virtual machine. - Access the default nginx site from a web browser: Once you have installed and configured Nginx on your virtual machine, you can access the default nginx site from a web browser using the public IP address of your virtual machine, such as
http://52.174.12.34. Be sure to usehttp:. Port 80 should already be opened for inboud traffic when you created your VM. You should see a page that says "Welcome to Azure! My name is MyVM." (or whatever your hostname is). If the port 80 is not yet opened for inboud traffic you can do the following:- Go to your virtual machine page on the Azure portal, and click on Networking on the left menu.
- Click on Add inbound port rule on the top menu.
- On the Add inbound security rule page, select TCP as the protocol, and enter 80 as the destination port range.
- Enter a name and a description for the rule, and click Add.
- Run the command
- Monitor and troubleshoot your virtual machine: Once you have connected to and interacted with your virtual machine, you can monitor and troubleshoot it using the Azure portal and via the Azure Cloud Shell CLI.
- Using the Azure portal: The Azure portal provides various metrics and logs that help you monitor and troubleshoot your virtual machine, such as CPU utilization, disk throughput, network traffic, and boot diagnostics. To monitor and troubleshoot your virtual machine using the Azure portal, you can follow these steps:
- On the Azure portal, go to your virtual machine page, and click on Metrics on the left menu.
- On the Metrics page, you can select and view various metrics that show the performance and health of your virtual machine, such as Percentage CPU, CPU Credits Consumed, Network In Total, and Network Out Total.
- Using the Azure Cloud Shell CLI: The Azure Cloud Shell CLI provides various commands that help you monitor and troubleshoot your virtual machine, such as
az vm show,az vm get-instance-view,az vm monitor, andaz vm diagnostics. To monitor and troubleshoot your virtual machine using the Azure Cloud Shell CLI, you can follow these steps:- Open the Azure Cloud Shell via the >_ icon in the menu at the top of the Azure Portal, a shell will open at the bottom.
- Show the properties and status of your virtual machine, using the command
az vm show, and enter the following information:- --resource-group: Enter the name of the resource group that contains your virtual machine, such as "MyResourceGroup".
- --name: Enter the name of your virtual machine, such as "MyVM".
- --output: Optionally, you can specify the output format of the command, such as "table" or "json".
- For example, the command could look like this:
az vm show --resource-group MyResourceGroup --name MyVM --output table. - Get the instance view of your virtual machine, which shows the runtime information and state of your virtual machine, using the command
az vm get-instance-view, and enter the following information:- --resource-group: Enter the name of the resource group that contains your virtual machine, such as "MyResourceGroup".
- --name: Enter the name of your virtual machine, such as "MyVM".
- --output: Optionally, you can specify the output format of the command, such as "table" or "json".
- For example, the command could look like this:
az vm get-instance-view --resource-group MyResourceGroup --name MyVM --output table. - Monitor the metrics of your virtual machine, which show the performance and health of your virtual machine, using the command
az vm monitor metrics tail, and enter the following information:- --resource-group: Enter the name of the resource group that contains your virtual machine, such as "MyResourceGroup".
- --name: Enter the name of your virtual machine, such as "MyVM".
- --metrics: Enter the name of the metrics that you want to monitor, such as "Percentage CPU" or "Network In".
- For example, the command could look like this:
az vm monitor metrics tail --resource-group MyResourceGroup --name MyVM --metrics "Percentage CPU". This will show the percentage CPU values for the last hour.
- Using the Azure portal: The Azure portal provides various metrics and logs that help you monitor and troubleshoot your virtual machine, such as CPU utilization, disk throughput, network traffic, and boot diagnostics. To monitor and troubleshoot your virtual machine using the Azure portal, you can follow these steps:
- Delete your virtual machine: If you no longer need your virtual machine, you can delete it to free up resources and avoid charges. To delete your virtual machine using the Azure portal, you can follow these steps:
- On the Azure portal, go to your virtual machine page, and click on Delete on the top menu.
- On the Delete virtual machine page, select to delete all the associated resources, such as disks, network interfaces, and public IP addresses. This will ensure that you do not incur any unnecessary costs for unused resources.
- Click on Apply force delete. If your virtual machine is in a failed state or cannot be deleted normally, you can use the force delete option to forcibly delete it. This will bypass any locks or dependencies that may prevent the deletion of your virtual machine.
- Click the checkbox to confirm the deletion of your virtual machine and click the Delete button. This may take a few minutes to complete.