
Docker: king of containers
The landscape of containers drastically shifted in 2013 with the advent of Docker, a game-changer that streamlined container development, deployment, and management across diverse platforms. Docker's introduction of container images revolutionized portability and reusability, making the step possible for many companies to start using containers in a practical way.
 In this section you will learn more about containers while taking your first practical steps with Docker.
🍪 Container Images, like cookie cutters
To start actually working with containers it is important to know where a container comes from what it is created and started up.
Container Image
Think of a container image as a snapshot or a template of a virtual environment. It includes all the necessary files, dependencies, libraries, and settings required to run a particular application or service.
This image is like a blueprint that defines everything needed for a container to function properly, including the operating system, runtime, application code, and configurations.
Importantly, a container image is static, meaning it remains unchanged unless explicitly modified. It serves as a consistent and reproducible starting point for creating multiple instances of containers.

It's akin to a cookie cutter and recipe for people to create cookies. The recipe and cookie cutter represents the container image, while each individual cookie pressed out with the cookie cutter and baked is like a container as the instance of that image.
Container = An instance
A container is a runtime instance of a container image. It's essentially a running process that is isolated from the host system and other containers.
When you create a container based on a container image, you're essentially instantiating that image into a live, running environment. This instance is what we refer to as a container.
Containers are ephemeral by nature, meaning they are designed to be easily created, started, stopped, and destroyed as needed. Any changes made to a running container, such as writing files or modifying configurations, are typically isolated within that container and do not affect the original image or other containers.

In summary, Docker utilizes container images as blueprints to create containers. Container instances represent the tangible, operational form of these images, providing sandboxed environments for executing applications or services with controlled dependencies and resource utilization. This instantiation process enables rapid deployment, efficient resource management, and consistent behavior across different computing environments.
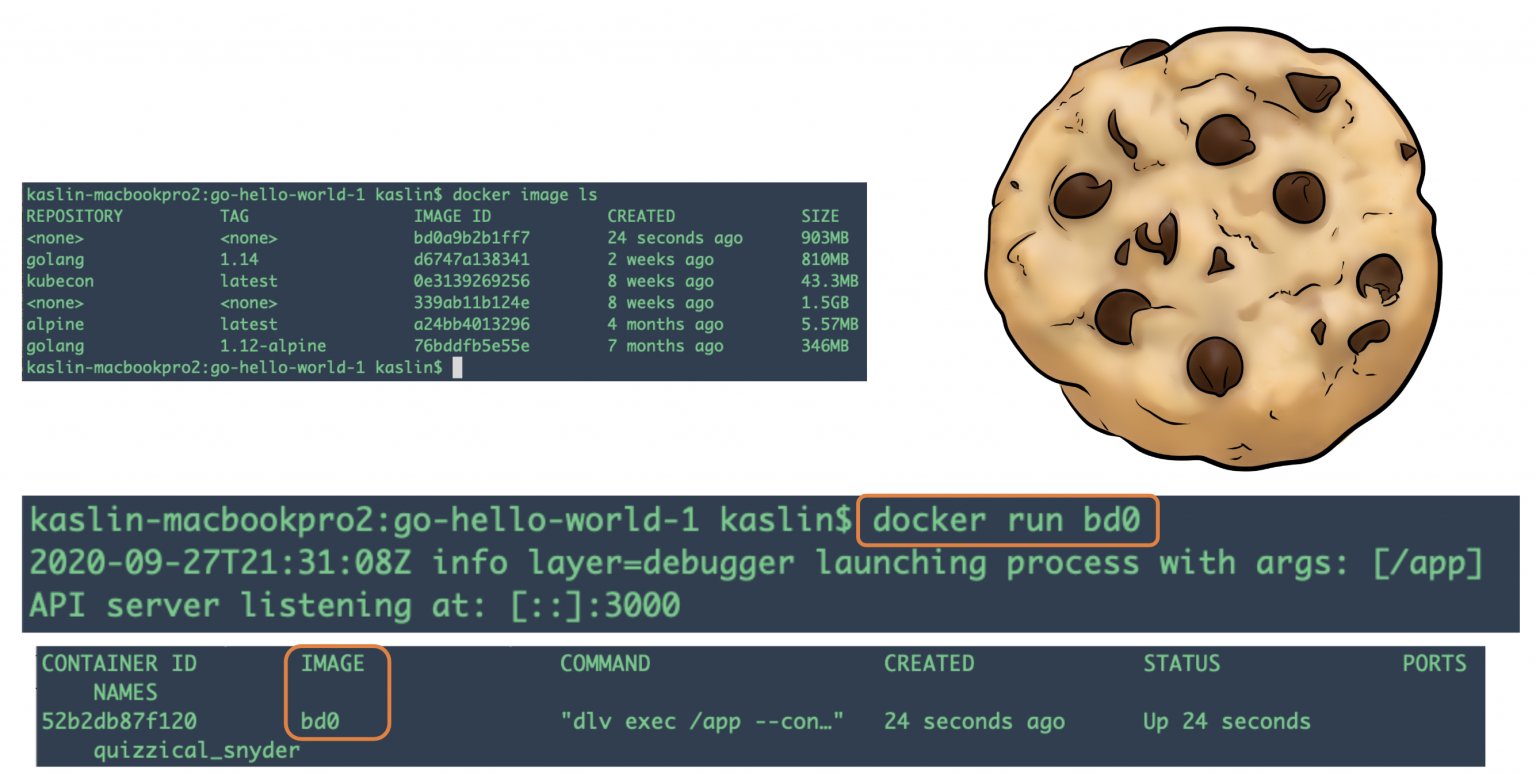
🍪 Thinking back to the cookies, when a machine wants to create 5 cookies (containers), it gets (downloads) the parts listed on the recipe (image) and uses it to cookie cutter five identical cookies (containers) it can then run. When the cookies are listed we can add toppings and other things to an individual cookie (edit the running container with bash commandline), of course without affecting the other cookies (containers) or the cookie cutter (image).
Docker Hub
 Docker Hub is a cloud-based repository where you can store and share your container images with others. It also provides access to a large number of public images created by the Docker community, which you can use as a base for your own images or containers.
It allows you to push your own images to your personal or organizational account, or pull images from other sources. You can also tag your images with different versions, search for images by keywords or categories, and rate or comment on images you like.
Some examples of, non user-created, official images on Docker Hub images are:
- nginx: An Alpine Linux base image with nginx installed, a popular web server that can also act as a reverse proxy, load balancer, or HTTP cache.
- mysql: A Debian Linux base image with MySQL installed, a widely used open-source relational database management system.
- tensorflow: A python base image, with TensorFlow installed, a framework for machine learning and deep learning, with support for various languages and platforms. The python base image itself is based on a Debian Linux image with Python installed on it.
What are Alpine and Debian Linux?
Alpine Linux and Debian Linux are both popular Linux distributions commonly used in the context of container images.
![]() Alpine Linux:
Alpine Linux:
- Alpine Linux is a lightweight Linux distribution designed for security, simplicity, and efficiency.
- Alpine Linux has a minimalistic approach, resulting in very small container images. But also miss many libraries and runtimes you might expect on a 'standard' Ubuntu.
- It utilizes a rolling release model, providing frequent updates and keeping the system up-to-date with the latest security patches and software versions.
- Alpine Linux is commonly favored for containerized environments due to its small image size, which leads to faster container startup times and reduced resource consumption.
![]() Debian Linux:
Debian Linux:
- Debian is one of the oldest and most stable Linux distributions, known for its robustness, versatility, and large software repository.
- Debian's stability and extensive software availability make it suitable for a wide range of use cases, including servers, desktops, and containers.
- While Debian provides a vast array of software packages, its container images tend to be larger compared to Alpine due to the inclusion of more features and dependencies.
In the context of container images, the main differences between Alpine Linux and Debian Linux lie in their image size, package availability, and runtime performance:
Image Size: Alpine Linux container images are significantly smaller than Debian images due to their minimalistic nature and the use of lightweight components like musl libc and BusyBox. This smaller size results in faster container startup times and reduced storage overhead.
Package Availability: Debian provides a vast repository of software packages, offering a wide range of options for developers and administrators. However, this extensive package availability comes at the cost of larger image sizes. Alpine Linux, on the other hand, has a more limited set of packages available in its repositories but prioritizes simplicity and security.
Runtime Performance: Alpine Linux's lightweight design often leads to better runtime performance in terms of resource utilization and container responsiveness compared to Debian. The reduced overhead of unnecessary components contributes to improved efficiency, especially in resource-constrained environments.
Ultimately, the choice between Alpine Linux and Debian Linux for containerized environments depends on factors such as the specific requirements of the application, desired image size, performance considerations, and the need for specific software packages.
By using a pre-made container image it's very easy to combine and use different tools. For example, to try out a new database. In most cases, you can use these official images, and just configure them with variables.
So, you would run multiple containers with different things, like a database, a Python application, a web server with a React frontend application, and connect them together via their internal network. All the container management systems (like Docker or Kubernetes) have these networking features integrated into them.
🛠 First steps with Docker
This exercise is based on Play with Docker.
For starters create an account on Docker Hub.
We shall be using the quite recent user-friendly Docker Desktop system. If you are using a Windows system the installation will check if you have WSL2 to support Docker: Install Docker for Desktop
In case you have an old PC it could be the case that the installer runs into an issue and you need to manually enable and Install WSL2, (skip Step 6!)
If you can run this command successfully your installation should be working:
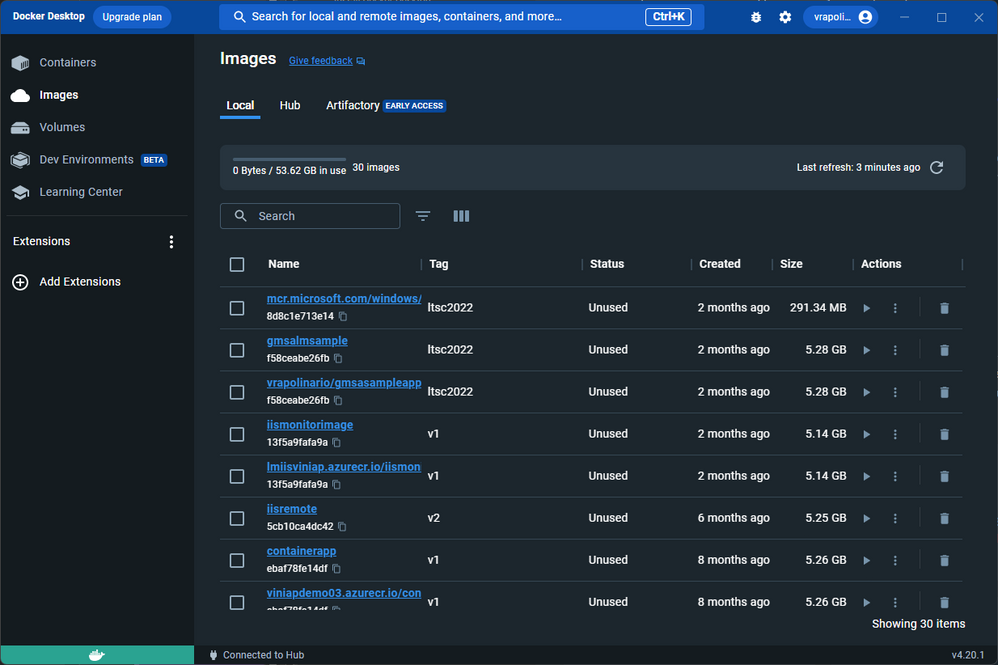
docker psYou should also be able to start the Docker Desktop GUI:
VirtualBox hypervisor conflicts
Older versions of VirtualBox used to conflict with Docker Desktop due to the usage of Hyper-V. Since Docker Desktop has included the possibility to use WSL2 instead of Hyper-V, the newer version of VirtualBox do not present this conflict anymore.
Containers and Processes
A container image normally includes in its metadata the default program or command that should be run when the container is started and the parameters to be passed to that program. Very similar to what would be if it was in the command line.
When a container is started, it will run that command/program (although you can override it and make it run a different command/program).
A container is running as long as the main process is running. It normally has a single process, but it's also possible to start subprocesses from the main process, and that way you will have multiple processes in the same container.
But it's not possible to have a running container without at least one running process. If the main process stops, the container stops.
🛠 Running your first container
It’s time to get your hands dirty! As with all things technical, a “hello world” app is good place to start. Type or click the code below to run your first Docker container:
docker run hello-worldThat’s it: your first container. The hello-world container output tells you a bit about what just happened.
Essentially, the Docker engine running in your terminal tried to find an image named hello-world. Since you just got started there are no images stored locally (Unable to find image...) so Docker engine goes to its default Docker registry, which is Docker Hub, to look for an image named hello-world.
It finds the image there, pulls it down, and then runs it in a container. And hello-world’s only function is to output the text you see in your terminal, after which the container exits.

Docker Images
In this rest of this section, you are going to run an Alpine Linux container. Alpine is a lightweight Linux distribution so it is quick to pull down and run, making it a popular starting point for many other images.
To get started, let’s run the following in our terminal:
docker image pull alpineThe pull command fetches the alpine image from the Docker registry and saves it in our system. In this case the registry is Docker Hub. You can change the registry, but that’s a different lab.
You can use the docker image command to see a list of all images on your system.
docker image lsREPOSITORY TAG IMAGE ID CREATED VIRTUAL SIZE
alpine latest c51f86c28340 4 weeks ago 1.109 MB
hello-world latest 690ed74de00f 5 months ago 960 BDocker Run
Now run a Docker container based on this image. To do that you are going to use the docker run command.
This command always creates a new container!
docker run alpine ls -ltotal 48
drwxr-xr-x 2 root root 4096 Mar 2 16:20 bin
drwxr-xr-x 5 root root 360 Mar 18 09:47 dev
drwxr-xr-x 13 root root 4096 Mar 18 09:47 etc
drwxr-xr-x 2 root root 4096 Mar 2 16:20 home
drwxr-xr-x 5 root root 4096 Mar 2 16:20 lib
...While the output of the ls command may not be all that exciting, behind the scenes quite a few things just took place.
When you call run, the Docker client finds the image (alpine in this case), creates the container and then runs a command in that container.
When you run docker run alpine, you provided a command (ls -l), so Docker executed this command inside the container for which you saw the directory listing. After the ls command finished, the container shut down.

The fact that the container exited after running our command is important, as you will start to see. Type in the following:
docker run alpine echo "hello from alpine"And you should get the following output:
hello from alpineIn this case, the Docker client dutifully ran the echo command inside our alpine container and then exited. If you noticed, all of that happened pretty quickly and again our container exited.
As you will see in a few more steps, the echo command ran in a separate container instance.
Imagine booting up a virtual machine (VM), running a command and then killing it. It would take a minute or two just to boot the VM before running the command. A VM has to emulate a full hardware stack, boot an operating system, and then launch your app... it’s a virtualized hardware environment.
Docker containers function at the application layer so they skip most of the steps VMs require and just run what is required for the app. Now you know why they say containers are fast!
Try another command.
docker run alpine shWait, nothing happened! Is that a bug? No! In fact, something did happen.
You started a 3rd instance of the alpine container and it ran the command sh and then exited. You did not supply any additional commands to sh so it just launched the shell, exited the shell, and then stopped the container.
What you might have expected was an interactive shell where you could type some commands.
Docker has a facility for that by adding a flag -it to run the container in an interactive terminal. For this example, type the following:
docker run -it alpine shYou are now inside the container running a Linux shell and you can try out a few commands like ls -l, uname -a and others. Note that Alpine is a small Linux OS so several commands might be missing. Exit out of the shell and container by typing the exit command.
Ok, we said that we had run each of our commands above in a separate container instance. We can see these instances using the docker ps command. The docker ps command by itself shows you all containers that are currently running:
docker psCONTAINER ID IMAGE COMMAND CREATED STATUS PORTS NAMESSince no containers are running, you see a blank line. Let’s try a more useful variant: docker ps -a
docker ps -aCONTAINER ID IMAGE COMMAND CREATED STATUS PORTS NAMES
36171a5da744 alpine "sh" 5 minutes ago Exited (0) 2 minutes ago fervent_newton
a6a9d46d0b2f alpine "echo 'hello from alp'" 6 minutes ago Exited (0)
6 minutes ago lonely_kilby
ff0a5c3750b9 alpine "ls -l" 8 minutes ago Exited (0) 8 minutes ago elated_ramanujan
c317d0a9e3d2 hello-world "/hello" 34 seconds ago Exited (0) 12 minutes ago stupefied_mcclintockWhat you see now is a list of all containers that you ran. Notice that the STATUS column shows that these containers exited some time ago.
Here is the same output of the docker ps -a command, shown diagrammatically (note that your container IDs and names will be different):

To find out more about run, use docker run --help to see a list of all flags it supports.
Container Isolation
In the steps above we ran several commands via container instances with the help of docker run. The docker ps -a command showed us that there were several containers listed. Why are there so many containers listed if they are all from the alpine image?
This is a critical security concept in the world of Docker containers. Even though each docker run command used the same alpine image, each execution was a separate, isolated container.
Each container has a separate filesystem and runs in a different namespace. So by default a container has no way of interacting with other containers, even those from the same image. Let’s try another exercise to learn more about isolation.
docker run -it alpine ashThe ash is another type of shell available in the alpine image. Once the container launches and you are at the container’s command prompt type the following commands:
echo "hello world" > hello.txt

ls
The first echo command creates a file called “hello.txt” with the words “hello world” inside it.
The second command gives you a directory listing of the files and should show your newly created “hello.txt” file. Now type exit to leave this container.
To show how isolation works, run the following:
docker run alpine lsIt is the same ls command we used inside the container’s interactive ash shell, but this time, did you notice that your “hello.txt” file is missing?
That’s isolation! Your command ran in a new and separate instance, even though it is based on the same image.
The 2nd instance has no way of interacting with the 1st instance because the Docker Engine keeps them separated and we have not setup any extra parameters that would enable these two instances to interact.
In every day work, Docker users take advantage of this feature not only for security, but to test the effects of making application changes.
Isolation allows users to quickly create separate, isolated test copies of an application or service and have them run side-by-side without interfering with one another.
Right now, the obvious question is “how do I get back to the container that has my ‘hello.txt’ file?”
Once again run the
docker ps -acommand again and you should see output similar to the following:
CONTAINER ID        IMAGE               COMMAND                  CREATED             STATUS                      PORTS               NAMES
36171a5da744        alpine              "ls"                     2 minutes ago       Exited (0) 2 minutes ago                        distracted_bhaskara
3030c9c91e12        alpine              "ash"               5 minutes ago       Exited (0) 2 minutes ago                        fervent_newton
a6a9d46d0b2f        alpine             "echo 'hello from alp'"    6 minutes ago       Exited (0) 6 minutes ago                        lonely_kilby
ff0a5c3750b9        alpine             "ls -l"                   8 minutes ago       Exited (0) 8 minutes ago                        elated_ramanujan
c317d0a9e3d2        hello-world         "/hello"                 34 seconds ago      Exited (0) 12 minutes ago                       stupefied_mcclintock
Graphically this is what happened on our Docker Engine:

The container in which we created the “hello.txt” file is the same one where we used the ash shell, which we can see listed in the “COMMAND” column. The Container ID number from the first column uniquely identifies that particular container instance.
In the sample output above the container ID is 3030c9c91e12. We can use a slightly different command to tell Docker to run this specific container instance. Try typing:
docker start CONTAINER_IDPro tip: short ids
Instead of using the full container ID you can use just the first few characters, as long as they are enough to uniquely ID a container. So we could simply use “3030” to identify the container instance in the example above, since no other containers in this list start with these characters.
Now use the docker ps command again to list the running containers.
docker psCONTAINER ID IMAGE COMMAND CREATED STATUS PORTS NAMES
3030c9c91e12 alpine "ash" 2 minutes ago Up 14 seconds distracted_bhaskaraNotice this time that our container instance is still running. We used the ash shell this time so the rather than simply exiting the way sh did earlier, ash waits for a command.
We can send a command in to the container to run by using the exec command, as follows:
docker exec CONTAINER_ID lsThis time we get a directory listing and it shows our “hello.txt” file because we used the container instance where we created that file.

🛠 Run an interactive Ubuntu container
Enter this into PowerShell (or Terminal), we will call this CLI1:
docker run -it ubuntu bashThis command:
- Runs the container
- Runs the bash process.
- Has the
-itinteractive flag so you can use normal bash commands in the Linux container in an interactive way, such asls. Your current command line window gets taken over and attached to the process you started, stdin.
Run the ls command in the Ubuntu container that you are attached to:
ls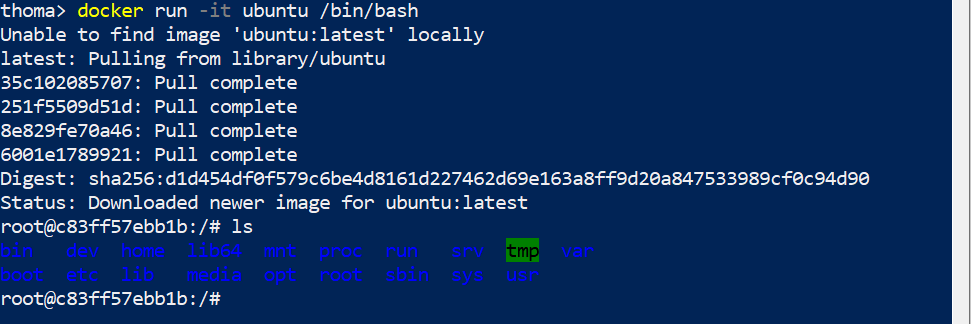
You can also try to install something in the container, like cowsay and then use it:
apt update
apt-get install cowsay/usr/games/cowsay HelloNow open a second PowerShell (or Terminal), which we will call CLI2, and type in:
docker psThis lists the currently running containers.

On CLI1 exit the container and the Linux file system again:
exitList the currently running containers on your system via CLI2, which should return an empty list:
docker ps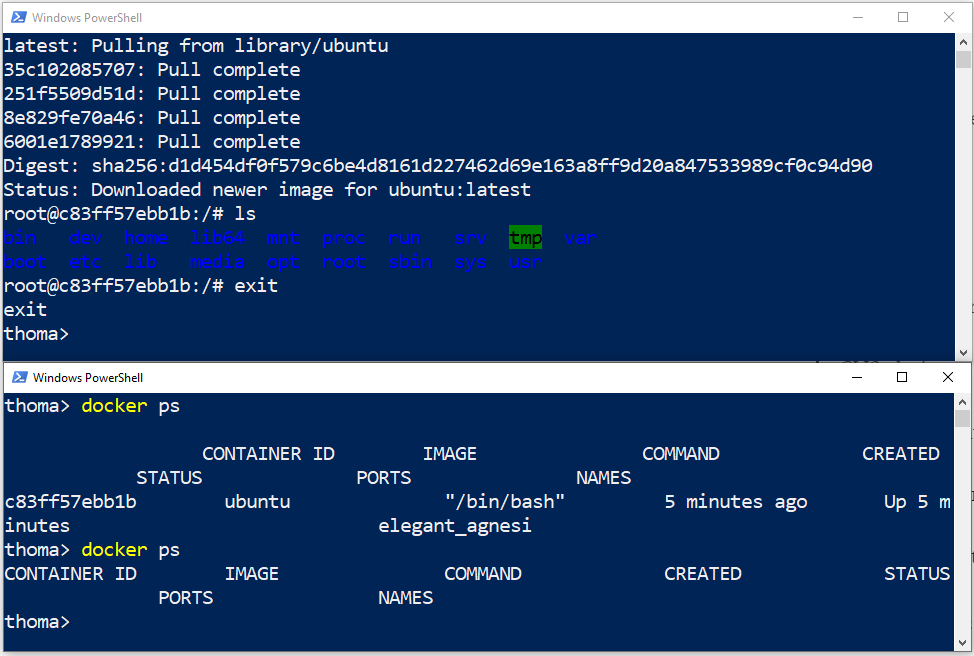
Try to list all containers via CLI2, the running ones and the stopped ones:
docker ps -a
We can restart a container that was previously running via CLI1:
docker start CONTAINER_ID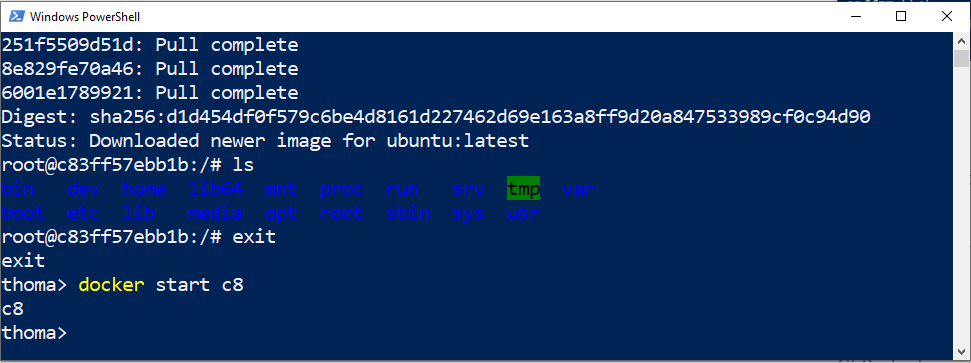
Check that the container comes up as running again via CLI2. Remark that the creation datetime is not the same as the running status datetime:
docker ps
We can also re-attach our CLI1 window to the container:
docker attach CONTAINER_ID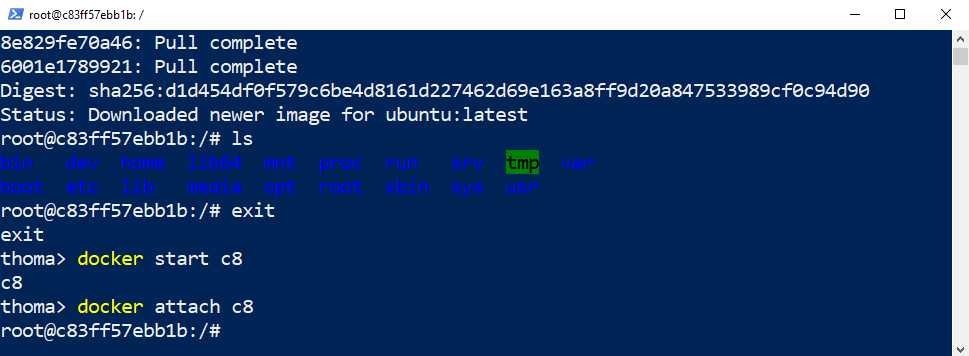
If you stop the running container via CLI2 you will be automatically kicked out of the interactive command line.
docker stop CONTAINER_ID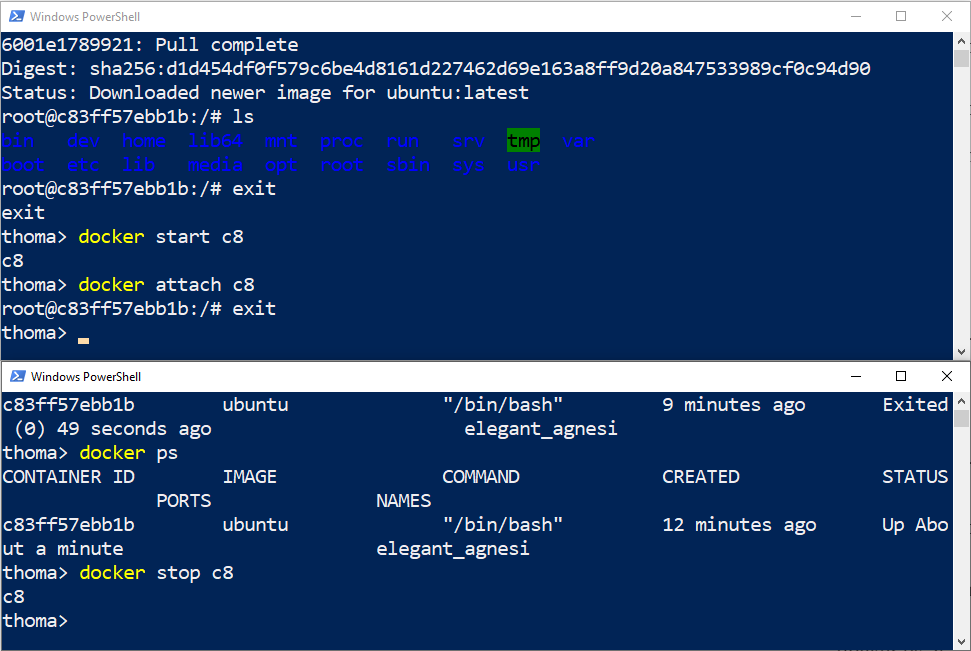
The container is not running anymore, hence it is not listed here:
docker psThe container is still in our system, but stopped:
docker ps -aRemove the container to clean up:
docker rm CONTAINER_IDCheck if the container is gone:
docker ps -a
This covers the basics of Docker commands. You can find the full list in the Docker Docs.
🛠 Run a background MySQL container
Background containers are how you’ll run most applications. Here’s a simple example using MySQL.
Run a new MySQL container with the following command:
docker container run --detach --name mydb -e MYSQL_ROOT_PASSWORD=abc123 mysql:latest--detach will run the container in the background. --name will name it mydb. -e will use an environment variable to specify the root password (NOTE: A password like this plain in an environment variable should never be done in production).
What is an environment variable?
An environment variable is a dynamic-named value that can affect the way running processes behave on a computer. In the context of Docker containers, environment variables are often used to pass configuration information to applications running inside the container. These can be booleans to switch something on or off in the application, URLs, usernames, ...
As the MySQL image was not available locally, Docker automatically pulled it from Docker Hub.
Unable to find image 'mysql:latest' locally
latest: Pulling from library/mysql
...
Status: Downloaded newer image for mysql:latest
As long as the MySQL process is running, Docker will keep the container running in the background.
List the running containers.
docker psCONTAINER ID IMAGE COMMAND CREATED STATUS PORTS NAMES
3f4e8da0caf7 mysql:latest "docker-entrypoint..." 52 seconds ago Up 51 seconds 3306/tcp mydbYou can check what’s happening in your containers by using a couple of built-in Docker commands: docker logs and docker top.
docker logs mydbThis shows the logs from the MySQL Docker container.
<output truncated>
2017-09-29T16:02:58.605004Z 0 [Note] Executing 'SELECT * FROM INFORMATION_SCHEMA.TABLES;' to get a list of tables using the deprecated partition engine. You may use the startup option '--disable-partition-engine-check' to skip this check.
2017-09-29T16:02:58.605026Z 0 [Note] Beginning of list of non-natively partitioned tables
2017-09-29T16:02:58.616575Z 0 [Note] End of list of non-natively partitioned tables
Let’s look at the processes running inside the container.
docker top mydbYou should see the MySQL daemon (mysqld) is running in the container.
PID                 USER                TIME                COMMAND
2876                999                 0:00                mysqld
Although MySQL is running, it is isolated within the container because no network ports have been published to the host. Network traffic cannot reach containers from the host unless ports are explicitly published.
Now we’ll use docker exec to run the command-line equivalent of mysql --user=root --password=abc123 --version inside our MySQL container to view the MySQL version.
docker exec -it mydb mysql --user=root --password=abc123 --versionYou will see the MySQL version number, as well as a handy warning.
mysql: [Warning] Using a password on the command line interface can be insecure.
mysql  Ver 14.14 Distrib 5.7.19, for Linux (x86_64) using  EditLine wrapper
You can also use docker exec to connect to a new shell process inside an already-running container. Executing the command below will give you an interactive shell (sh) inside your MySQL container.
docker exec -it mydb shNotice that your shell prompt has changed. This is because your shell is now connected to the sh process running inside of your container.
Let’s check the version number by running the same command again, only this time from within the new shell session in the container.
mysql --user=root --password=abc123 --versionNotice the output is the same as before.
Type exit to leave the interactive shell session. Be sure to stop and remove the container.
🛠 Opening ports and connecting to a background MySQL container
Now run a similar command as you did previously to start a MySQL container, but now include the port tag -p.
docker run -d --name mydb2 -p 3306:3306 -e MYSQL_ROOT_PASSWORD=abc123 mysql:latestExplanation of the flags used:
--detach: Runs the container in the background.--name mydb2: Names the containermydb2.-p 3306:3306: Publishes port 3306 of the container to port 3306 on the host in the form (-p host-port:container-port), allowing external connections to the MySQL database.-e MYSQL_ROOT_PASSWORD=abc123: Sets the environment variableMYSQL_ROOT_PASSWORDtoabc123, which will be used as the root password for the MySQL database.
🏠 Understanding Ports, they're like doors
In networking, a port is a communication endpoint that processes incoming and outgoing data. You can think of a port as a door of a house. The house address is the IP or hostname of the machine, and the door number is the port number. Different doors can lead to different rooms or services inside the house. For example, port 80 is usually used for web servers, port 22 for SSH, and port 3306 for MySQL. By publishing port 3306 of the container to the same port on the host (-p 3306:3306), we allow external applications, like MySQL Workbench, to knock on the door and access the MySQL database running inside the Docker container. The host port is the door number on the outside of the house, and the container port is the door number on the inside of the house. They can be the same or different, depending on how you want to map them.
Port Conflicts
If you encounter a "port already in use" error, it likely means that another application or service is already using port 3306 on your host machine. This could happen if you have a local instance of MySQL installed, or another Docker container running on the same port. This is like having two doors with the same number on the same house, which would be confusing and not allowed. To avoid this, you need to make sure that each port is used by only one service at a time.

To resolve the port conflict, you can choose different ports on the host machine. For example, you can change the command to publish container port 3306 to host port 3307:
docker run -d --name mydb2 -p 3307:3306 -e MYSQL_ROOT_PASSWORD=abc123 mysql:latestOr to port 3308:
docker run -d --name mydb2 -p 3308:3306 -e MYSQL_ROOT_PASSWORD=abc123 mysql:latestBy changing the host port, you avoid conflicts with existing services. Remember to use the corresponding port when connecting from MySQL Workbench or any other client application. This is like changing the door number on the outside of the house, but keeping the same door number on the inside of the house. The external applications will need to know the new door number to access the service inside the container.
Connecting with MySql workbench
After running the container with these commands, you can connect to the MySQL database using MySQL Workbench by following these steps:
- Open MySQL Workbench.
- Click on the "+" icon next to "MySQL Connections" to create a new connection.
- Enter the connection details:
- Connection Name: Any name you like (e.g., My Docker MySQL)
- Hostname:
localhost - Port:
3306or the other port you just used - Username:
root - Password (in vault):
abc123
- Click "Test Connection" to verify that the connection is successful.
- Once verified, click "OK" to save the connection.
- Double-click on the newly created connection to connect to the MySQL database running in the Docker container.
You should now be connected to the MySQL database running in the Docker container using MySQL Workbench.
🛠 Running a website in an nginx container
An nginx container and a VM running nginx are both ways of deploying nginx, a popular web server to host a website. Here you will use a nginx container to do the same exercise as you did earlier on an Azure VM. As said before, the nginx container is an Alpine Linux base image with nginx installed.
Run the container and edit the website using Interactive Shell
Start an interactive shell in the nginx container:
docker run -it --name mynginx -p 8080:80 nginx:latest bashExplanation:
-it: Runs the container in the foreground.--name mynginx: Names the containermynginx.-p 8080:80: Publishes port 80 of the container to port 8080 on the host, allowing external access to the Nginx web server without a conflict with port 80 on your machine.nginx:latest: Specifies the Nginx image and version to use.bash: Starts an interactive shell inside the container.
Once inside the container, echo the HTML content into index.html:
echo '<html><body><h2>Welcome to Docker! My name is mynginx.</h2></body></html>' > /usr/share/nginx/html/index.htmlThen start the nginx server process in the container:
nginxAfter running the container and executing these commands inside the interactive shell, you should be able to access the webpage from your host machine by opening a web browser and navigating to http://localhost:8080.
To exit the command line interactive in the container without stopping it, you can press Ctrl+P followed by Ctrl+Q. This will detach the container and allow you to return to your system’s shell. Alternatively, you can also detach from a container with a command in a different terminal window. The command is docker detach [container-name-or-id].
Run webserver directly from the docker run command
Instead of interactively going into the container, we can simply run the container without any extra command and the nginx container will automatically start the webserver already.
docker run -d --name mynginx2 -p 8081:80 nginx:latestExplanation:
-d: Runs the container in the background.--name mynginx2: Names the containermynginx2.-p 8081:80: Publishes port 80 of the container to port 8081 on the host, allowing external access to the Nginx web server. Nor with the previous container if it is still running.nginx:latest: Specifies the Nginx image and version to use.
After running the container with the specified command, you should be able to access the default webpage from your host machine once again by opening a web browser and navigating to http://localhost:8081.
If you want to once again edit the default webpage you can use:
docker exec mynginx2 sh -c "echo '<html><body><h2>Welcome to Docker! My name is mynginx2.</h2></body></html>' > /usr/share/nginx/html/index.html"This starts a shell on the containers and sends the echo command from before to the container to be executed. Now you will once again see an edited default webpage.
To have a container run one, two or more commands on startup we will look at creating our own containers later.
Be sure to clean or remove your containers if needed!